Step 1: Change the RDP Port
-
Open the Windows Registry Editor
- Press Windows Key + R, type regedit, and press Enter.
- Click Yes if prompted by User Account Control.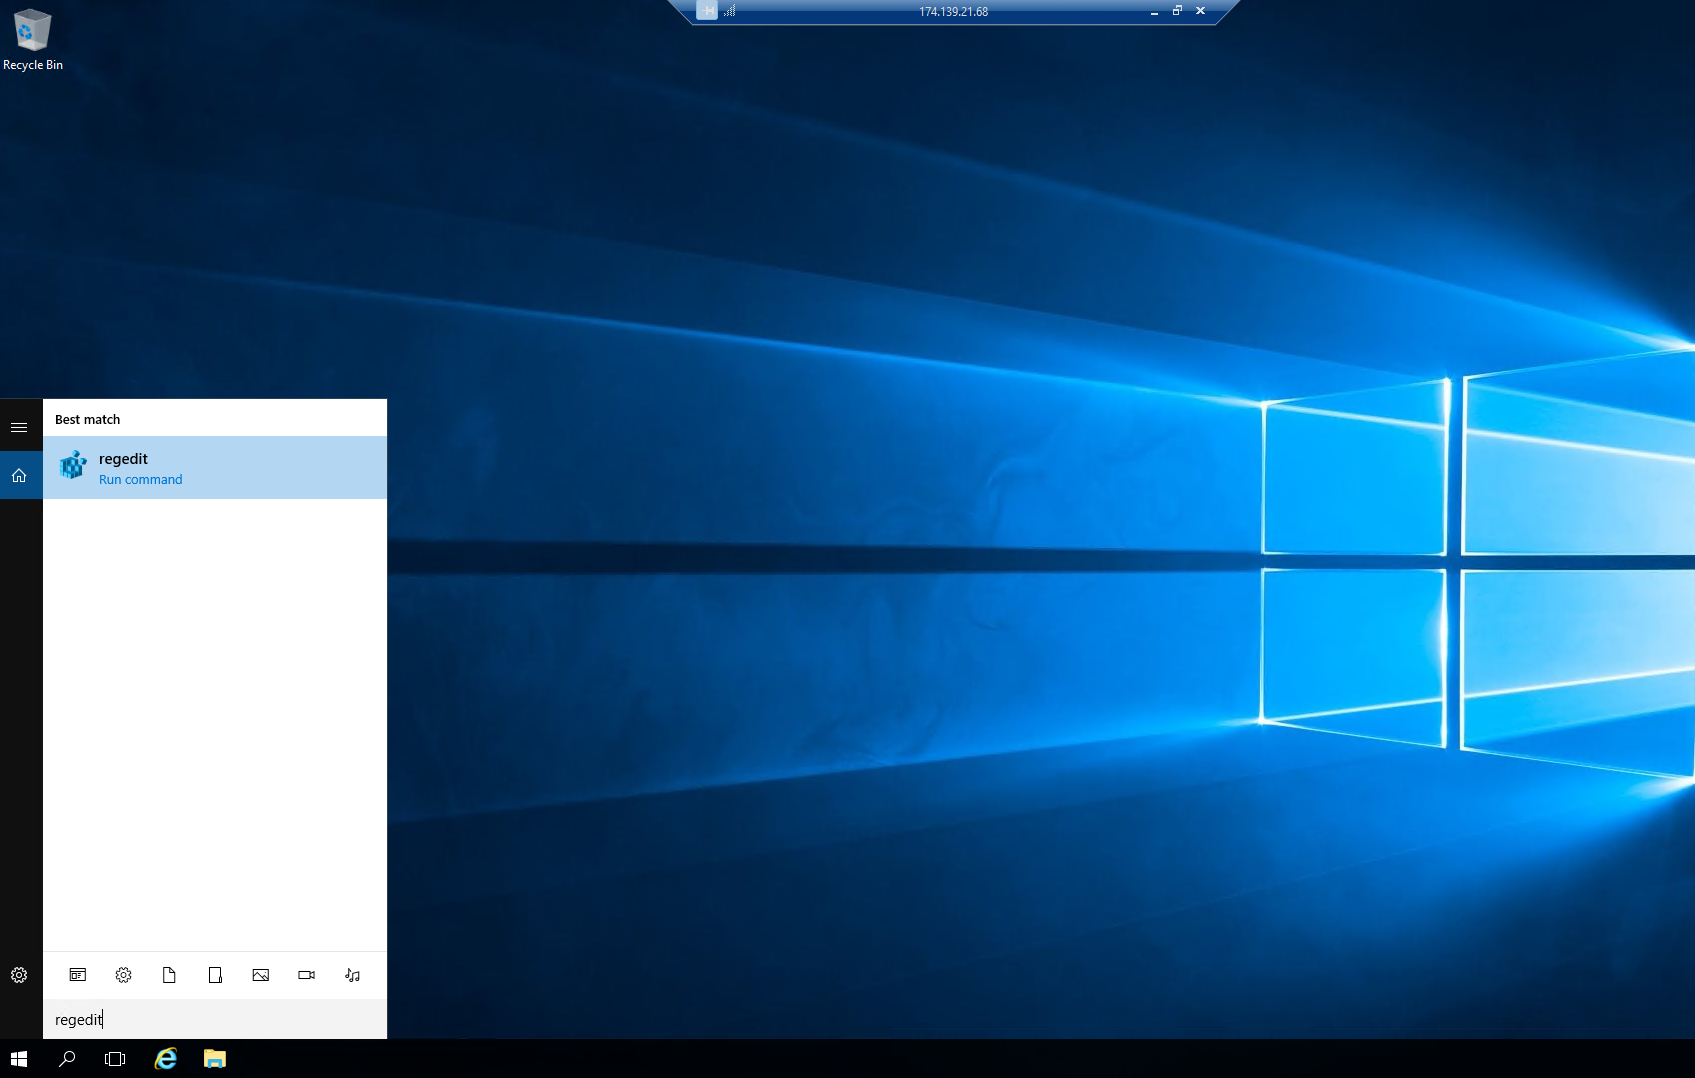
-
Navigate to the RDP Port Setting
- Go to the following registry key: HKEY_LOCAL_MACHINE\System\CurrentControlSet\Control\TerminalServer\WinStations\RDP-Tcp\PortNumber
- Locate the entry named PortNumber.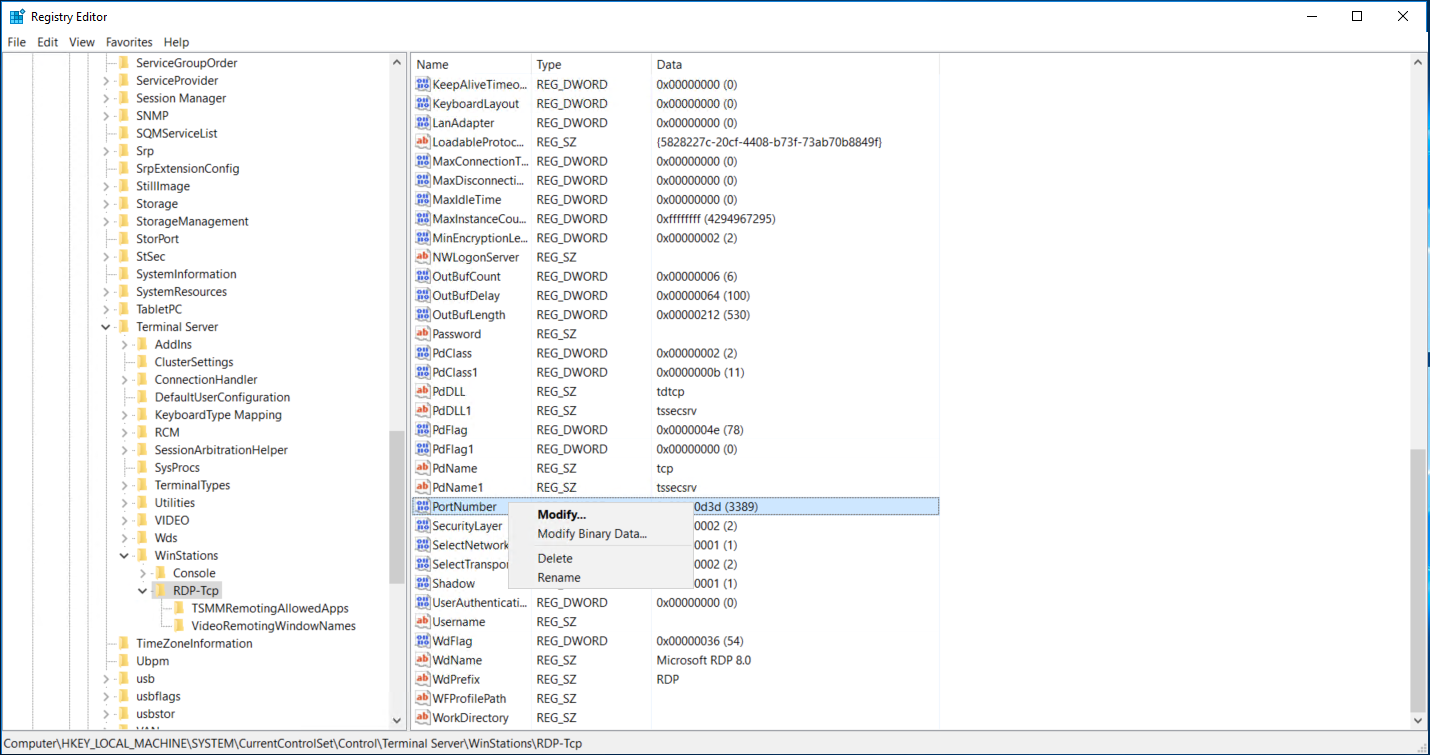
-
Modify the Port Number
- Double-click on PortNumber.
- Change the Value data to the desired port number (e.g., 5000). Make sure the number is between 1025 and 65535 and not in use by another service.
- Click OK.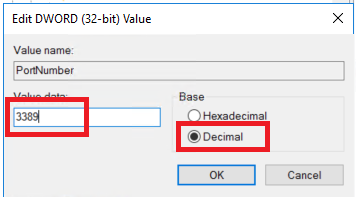
-
Close the Registry Editor
- Exit the Registry Editor and restart your computer for the changes to take effect.Step 2: Update the Firewall Rules
-
Open Windows Firewall Settings
- Press Windows Key + R, type Windows Firewall with Advanced Security, and press Enter.
- Navigate to System and Security > Windows Defender Firewall > Advanced settings.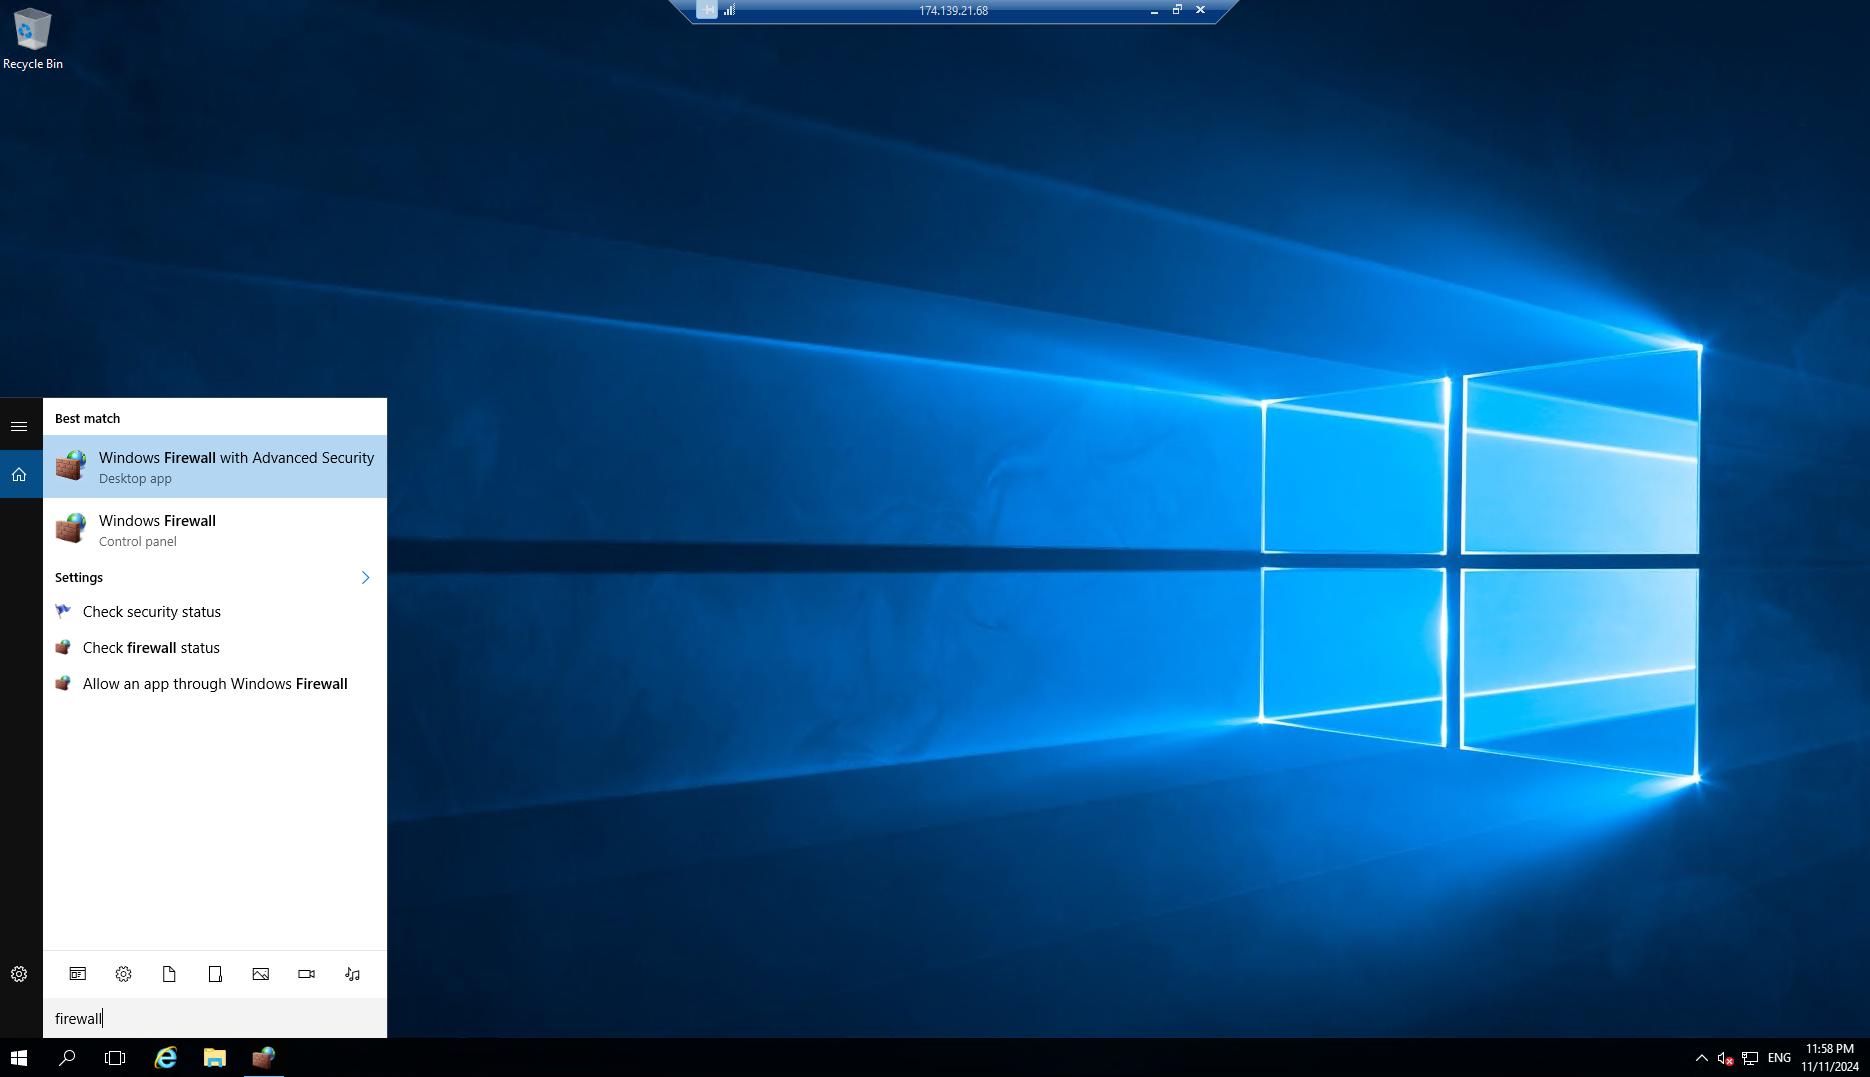
Create a New Rule
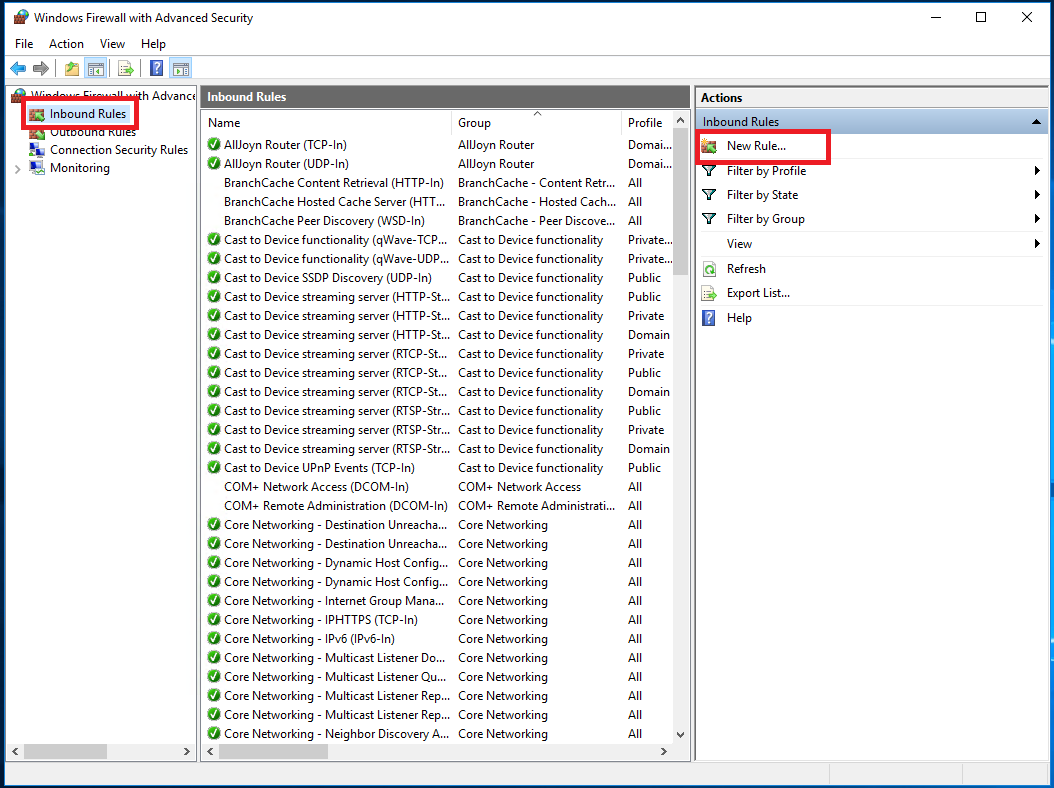
- In the left-hand pane, select Inbound Rules. - You can create a new rule instead:-
In the right-hand pane, click New Rule.
Select Port and click Next.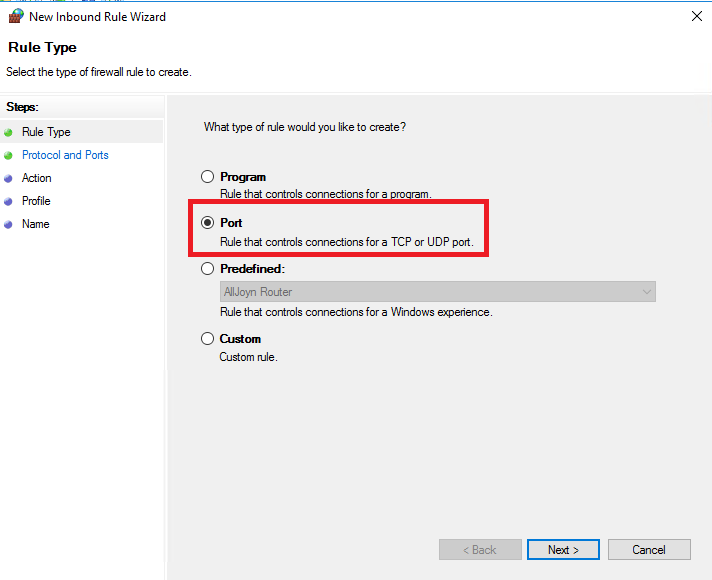
Choose TCP, enter the new port number, and click Next.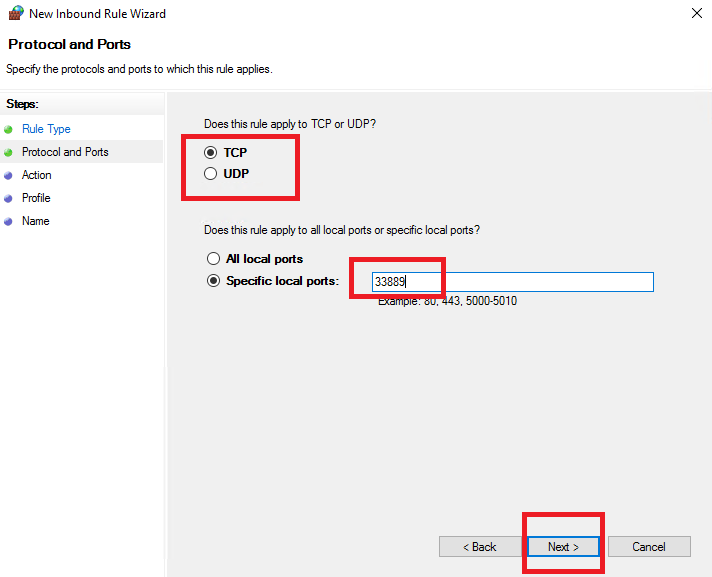
Select Allow the connection and click Next.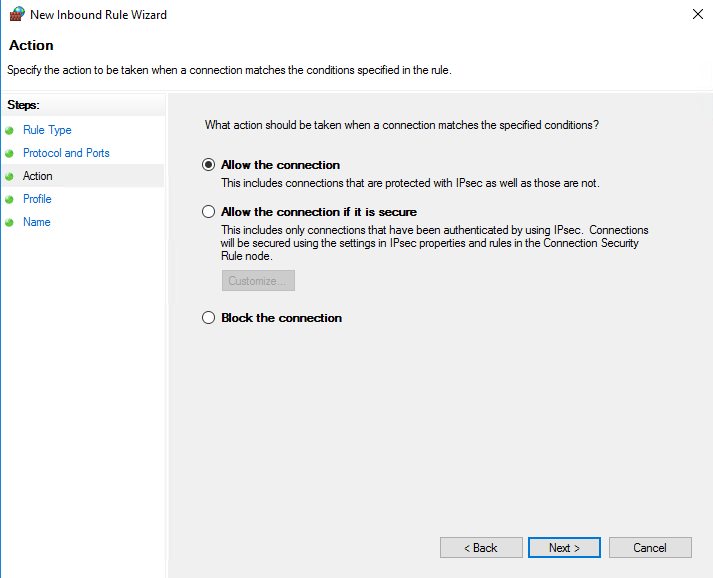
Choose the appropriate profiles (Domain, Private, or Public) and click Next.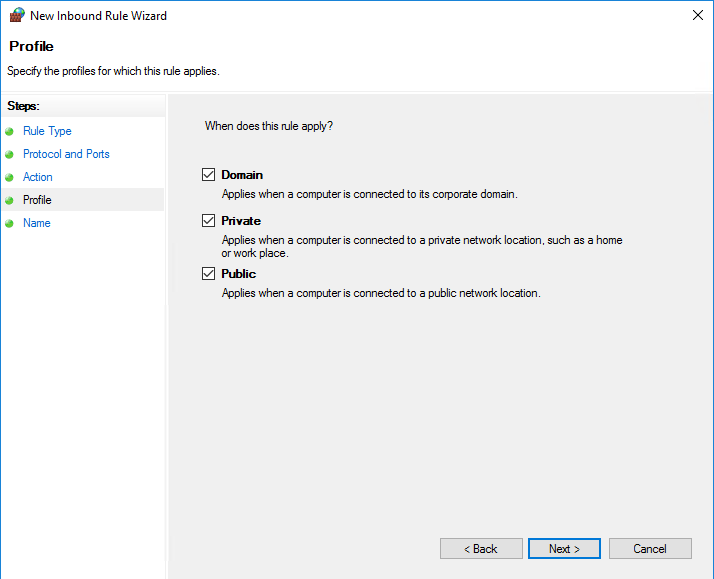
-
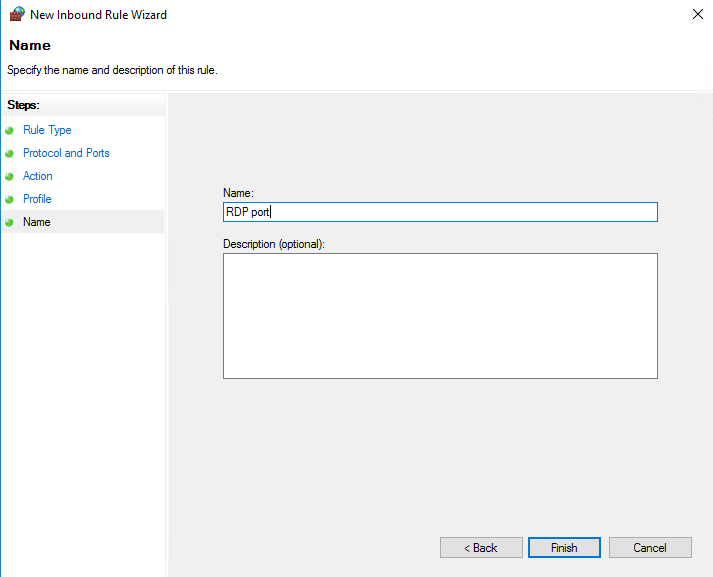
Provide a name for the rule (e.g., "RDP Custom Port") and click Finish.
Save and Apply Changes- Close the Windows Firewall settings.Step 3: Test the New RDP Port
-
Restart Your Computer
- Restart the system to apply the changes. -
Connect Using the New Port
- When connecting via Remote Desktop, specify the new port number.

Example: 192.168.1.100:33889 (replace 192.168.1.100 with your IP and 33889 with your new port).
-
-
-


